Related articles: Library & Inbox, Posts, Galleries, Cards
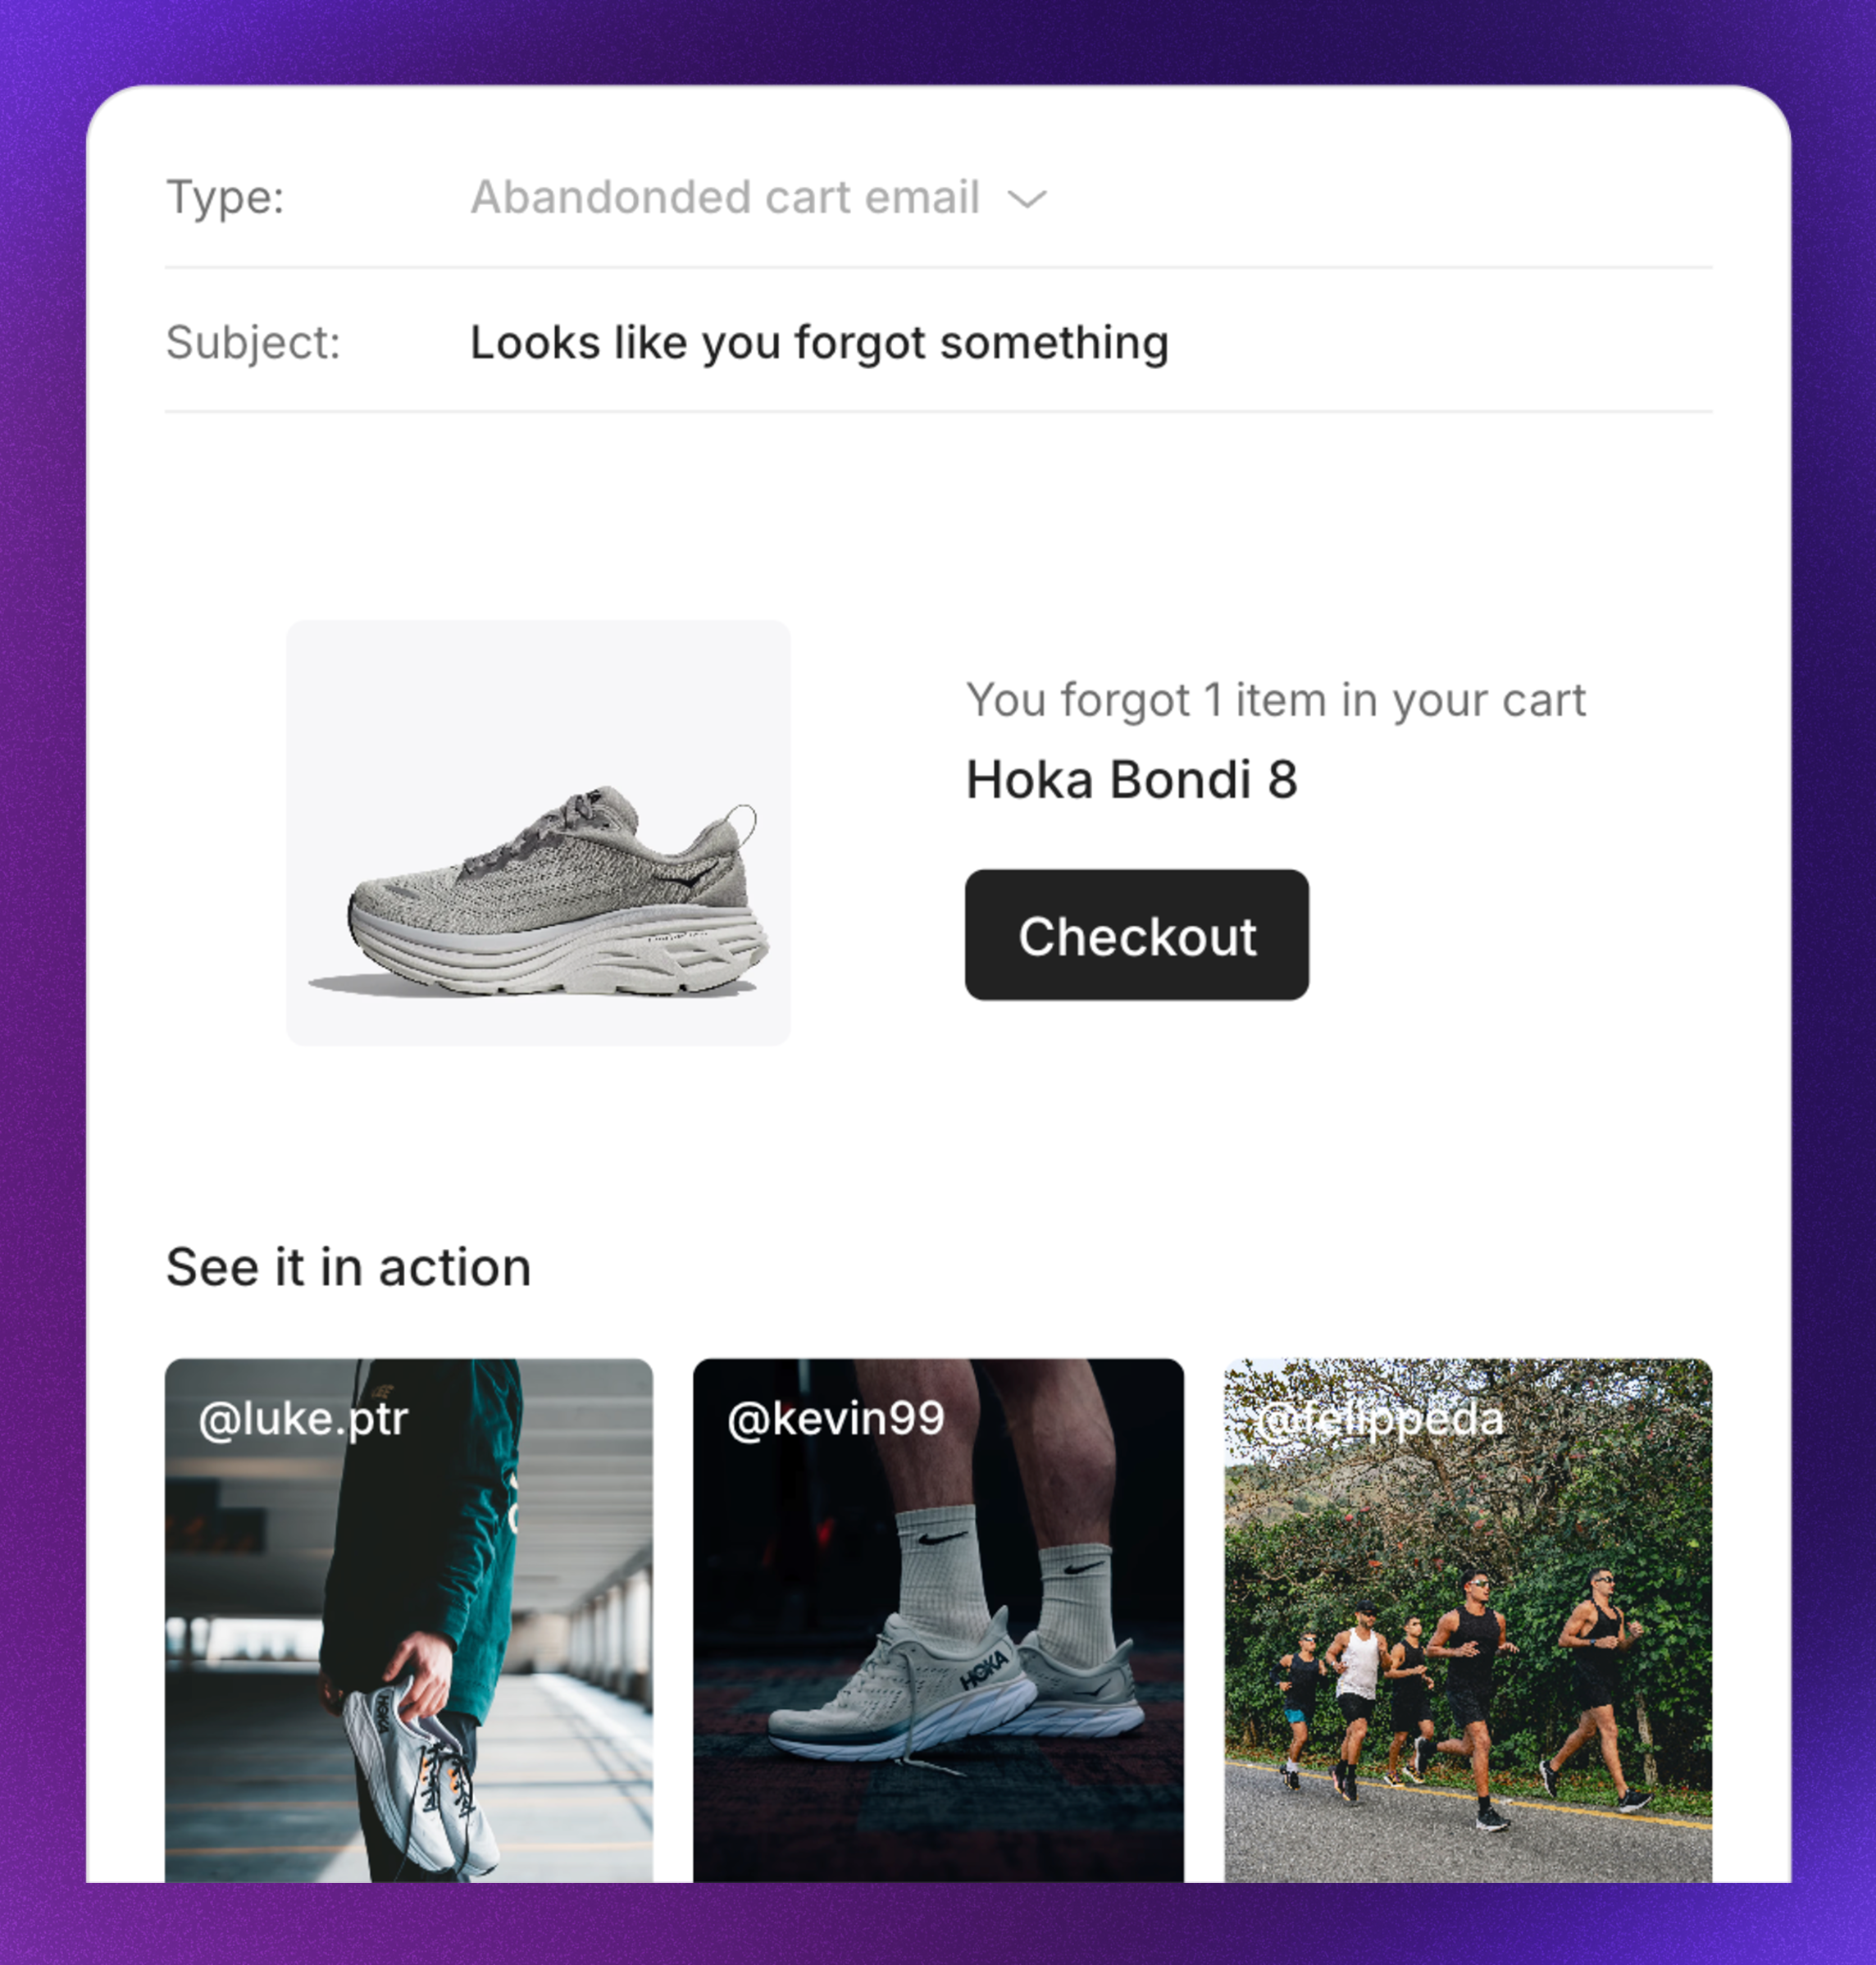
Available email widgets
Create an email widget
- Navigate to UGC -> Email widgets
- Click New email widget
- Select the widget type
- Optional: Click More and rename your widget
- Click Save changes
Select content
How you select content depends on the widget type.Static content
Hand-pick specific posts to display.- Click the Content tab
- Click Static content
- Click Add posts from library
- Select the posts you want to include
- Click Add posts
- Click Save changes
Dynamic content
Set filters to automatically include matching posts.- Click the Content tab
- Click Dynamic content
- Click Filters
- Apply your filters
- Click Save changes
Pin posts
Pin posts to keep them in a specific position. Pinned posts won’t be replaced when new content is added.- Click the Content tab
- Click All posts
- Drag a post to pin it to that position
- Click Save changes
Design settings
Customize how your email widget looks.- Click the Design tab
- Apply your settings
- Click Save changes
New email widgets inherit the width setting from your most recently created widget.
Design settings
These settings are available when embedding via HTML code.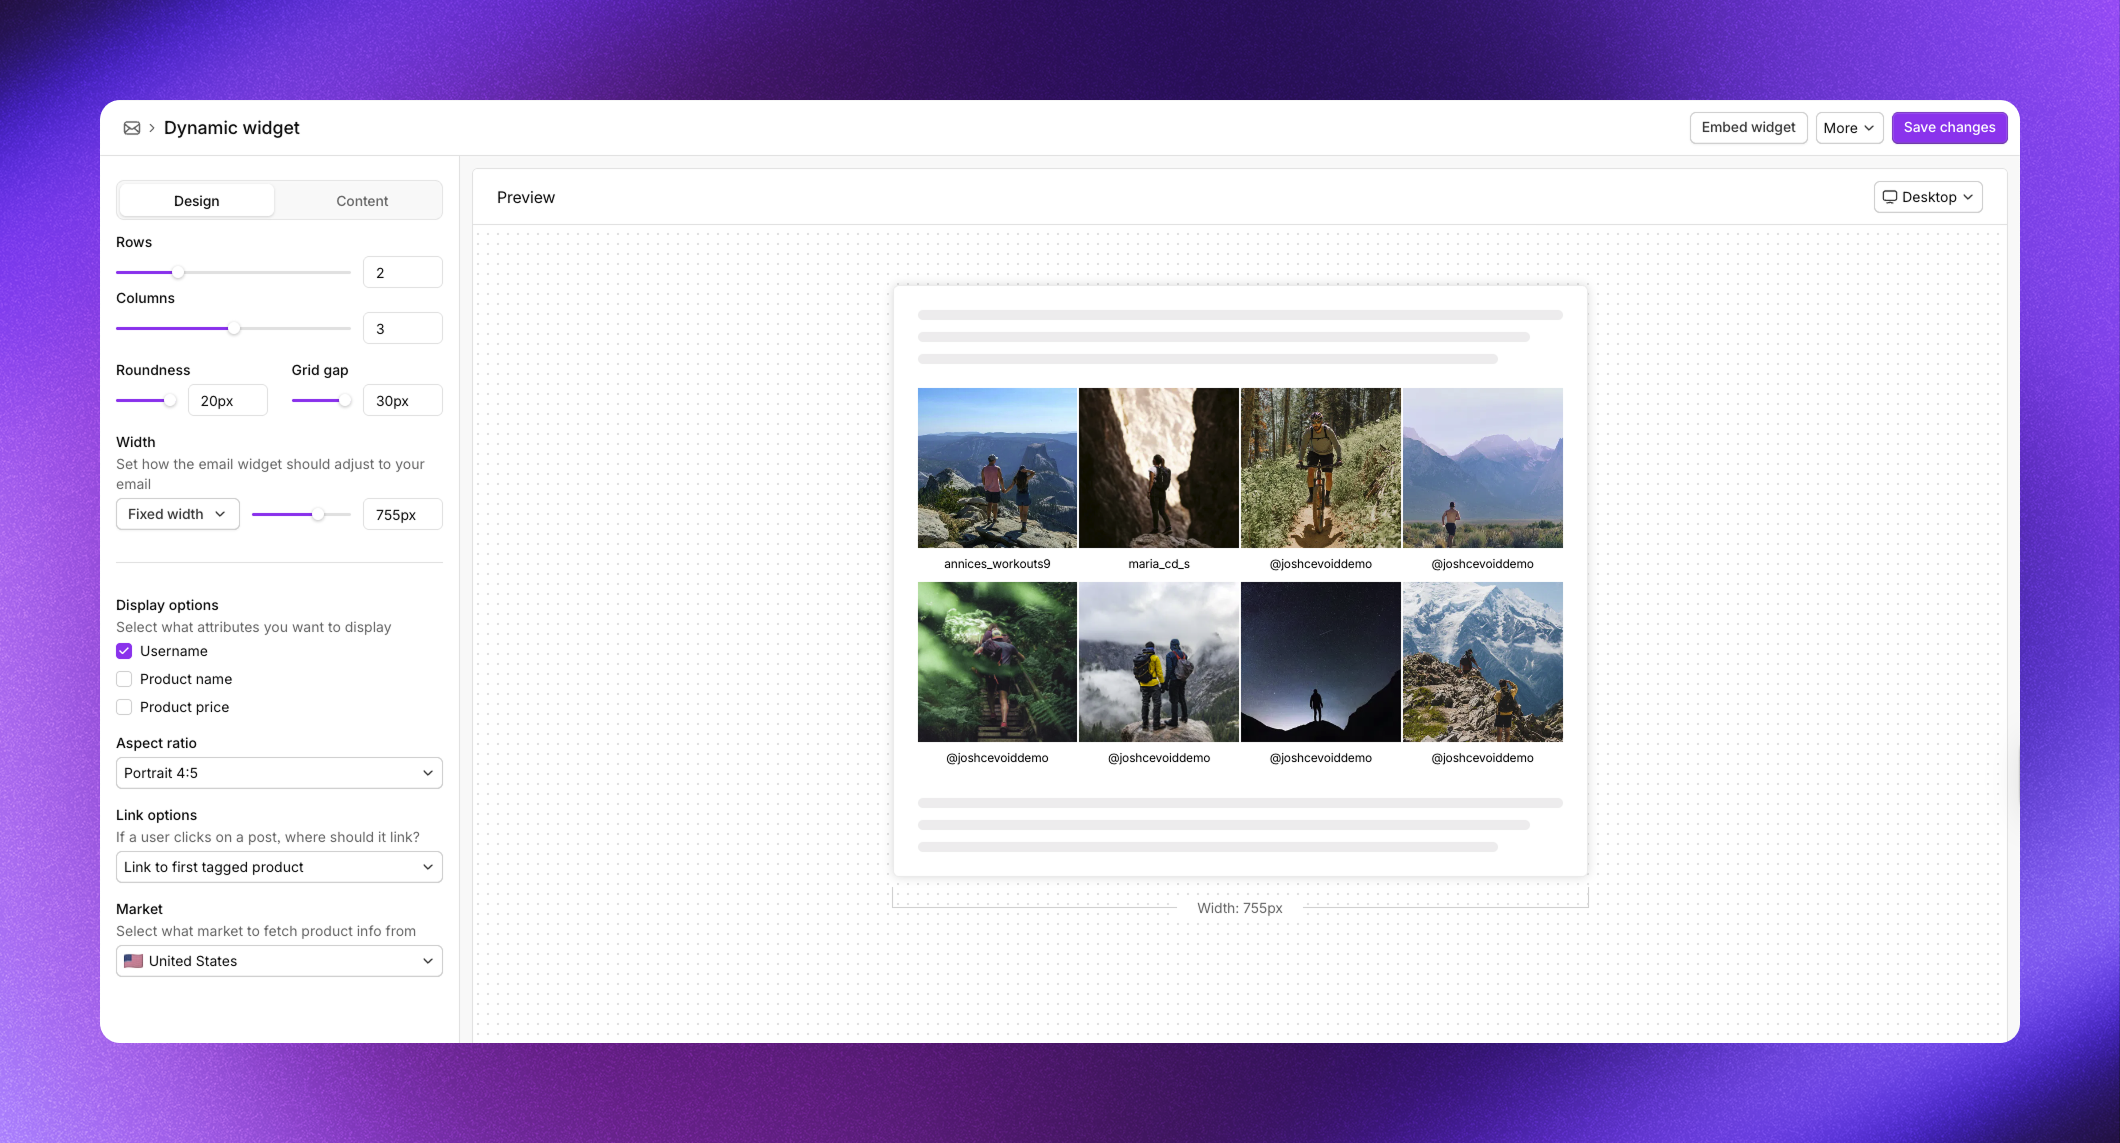
Voyado settings
When using Voyado’s native Cevoid block, layout is controlled in Voyado. Cevoid controls:Fallback setting
Available for Abandoned cart and Post-purchase widgets. When enabled, the widget uses Cevoid’s fallback AI to make sure there’s always something to show, even for products with limited UGC. How content is prioritized:- Posts tagged with the exact product variant
- Posts tagged with other variants that share attributes (like color or size)
- Posts tagged with the primary product or any variant of the same product
- Posts featuring similar products based on Cevoid’s AI
To enable fallback:
- Click the Design tab
- Toggle on Fallback posts
- Click Save changes
Embed email widgets
How you embed depends on your email platform.- Klaviyo
- Voyado
- General implementation
For static widgets:
- Navigate to UGC -> Email widgets and select your widget
- Click Embed widget
- Select the market
- Copy the HTML code
- In Klaviyo, open your email campaign or flow
- Add a Text block or HTML block
- Paste the code
- Save
- In Cevoid, click Embed widget
- In Klaviyo, go to Settings -> Other -> Web feeds
- Click Add web feed
- Copy and paste the web feed name from Cevoid
- Copy and paste the Feed URL from Cevoid
- Set request method to GET
- Set content type to JSON
- Click Add web feed
- Copy the HTML code from Cevoid
- In Klaviyo, open your email campaign or flow
- Add a Text block or HTML block
- Paste the code
- Save
The web feed ensures content updates automatically without creating new widgets for each email.