Related articles: Upload forms, UGC from Instagram, Challenges, Member opt-in & enrollment
Only activated policies are displayed to customers.
Available policies
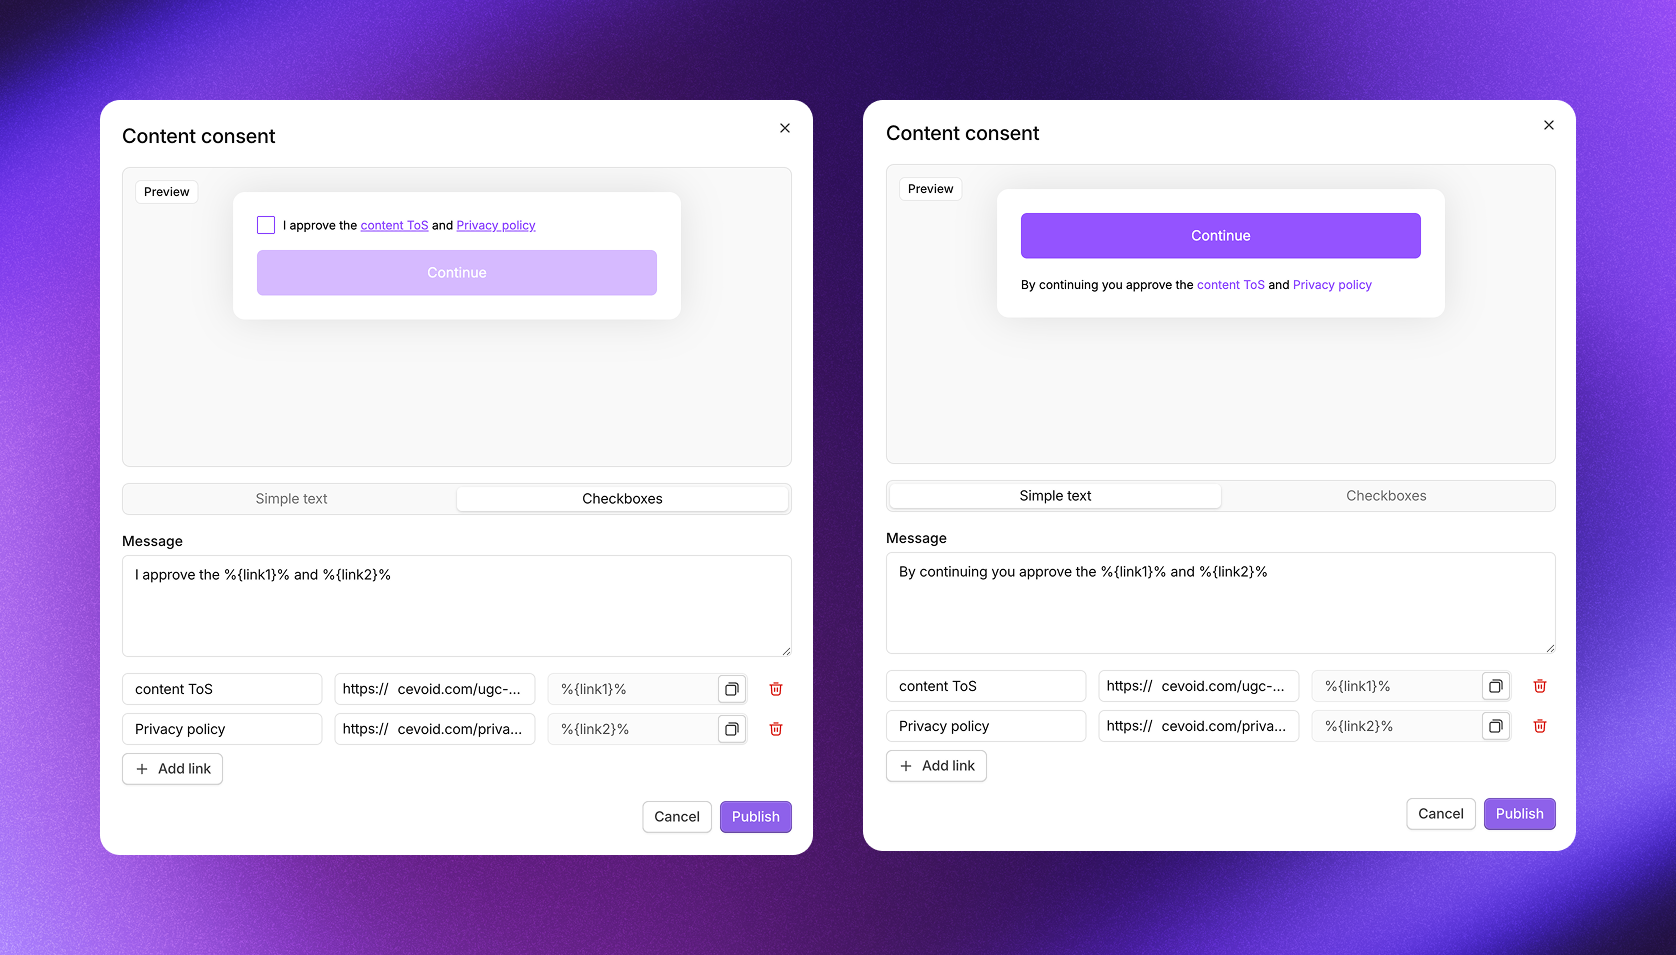
Content consent
The content consent policy ensures that anyone submitting content to your brand approves your UGC policy and grants permission to use their content. This protects both you and the creator by making the terms of use clear upfront. Where it’s displayed:Activate content consent
- Navigate to Settings -> Legal
- Open Content consent
- Select Simple text or Checkboxes based on your requirements
- Enter your message and add any required links
- Click Publish
- Repeat for any additional jurisdictions you need
Program opt-in consent
The program opt-in consent policy ensures that members agree to your program terms before participating in any activities. This is essential for transparency and helps you stay compliant with consumer protection regulations. You can also collect marketing consent at the same time, streamlining the opt-in experience while keeping consent properly documented. Where it’s displayed:This policy is only enforced through Cevoid widgets. Members may opt in through other methods depending on your opt-in settings.
Activate program opt-in consent
- Navigate to Settings -> Legal
- Open Program opt-in consent
- Select Simple text or Checkboxes based on your requirements
- Enter your message and add any required links
- Optional: Add a marketing communication message to collect email consent at the same time
- Simple text automatically approves everyone for marketing communications
- Checkboxes only approves members who explicitly check the marketing box
- Click Publish
- Repeat for any additional jurisdictions you need
Competition terms
When running challenges that are formal competitions, you may need to display specific legal terms beyond your standard content consent. The competition terms policy lets you add these requirements to specific challenges.Competition terms are not automatically displayed on all challenges since not every challenge is a competition. You need to enable them per challenge.
Activate competition terms
- Navigate to Settings -> Legal
- Open Competition terms
- Select Simple text or Checkboxes based on your requirements
- Enter your message and add any required links
- Click Publish
- Repeat for any additional jurisdictions you need
Enable competition terms on a challenge
- Edit the challenge
- Click General Settings
- Toggle on Competition Terms
Consent options
Each policy can be configured to use either checkboxes or simple text. You can use different options for different jurisdictions based on local requirements.
The only exception is the marketing communication option in program opt-in consent, which always uses an optional checkbox regardless of your main consent setting.
Jurisdictions
Different markets often have different legal requirements. Jurisdictions let you configure separate policy versions for different regions. Cevoid widgets automatically display the correct policy based on the market they’re shown in.You only need to set up jurisdictions if you want different policies for different markets. The default policy applies to all markets that don’t have a specific jurisdiction assigned.
Create a jurisdiction
- Navigate to Settings -> Legal
- Click Add jurisdiction
- Name the jurisdiction (e.g., “EU” or “UK”)
- Select which markets should use this jurisdiction’s policies
- Click Create
- Configure the jurisdiction-specific policies