Ensure that you have activated the Klaviyo integration before getting started
How profile data and events are shared based on your setup
One Klaviyo account connected to a Cevoid workspace
One Klaviyo account connected to a Cevoid workspace
Profiles will be synced to the Klaviyo account no matter what market they belong to
- Profiles with an email that also exist in Klaviyo will automatically be synced
- Profiles with an email that does not exist in Klaviyo will only be automatically synced if you enabled this setting on the Klaviyo integration page
Multiple Klaviyo accounts connected to a Cevoid workspace
Multiple Klaviyo accounts connected to a Cevoid workspace
To avoid multiple Klaviyo accounts sending emails to the same profile, Cevoid will only sync a profile to the market which they belong to.
- Profiles with an email that also exist in Klaviyo will automatically be synced
- Profiles with an email that does not exist in Klaviyo will only be automatically synced if you enabled this setting on the Klaviyo integration page
Send profile events to Klaviyo
You need to activate what events you want to share before they’re made available in Klaviyo.
Each event also includes relevant data that can be used in the email. For example, the Cevoid: Reward Fulfilled event includes a list of reward details.
Show how it looks in Klaviyo
Show how it looks in Klaviyo

Activate profile event sharing to Klaviyo
- Navigate to Settings -> Integrations -> Klaviyo
- Navigate to the Events section
- Click Edit fields
- Toggle on the events you want to send to Klaviyo
- Click Save Changes
See what data is included in each event
- Navigate to Settings -> Integrations -> Klaviyo
- Navigate to the Events section
- Click Edit fields
- Click the icon on the event you want to preview
Send test event to Klaviyo
Sending a test event will trigger that event on a test profile and make the event available in Klaviyo
- Navigate to Settings -> Integrations -> Klaviyo
- Navigate to the Events section
- Click Edit fields
- Click the icon on the event you want to send
- Click Send and verify event
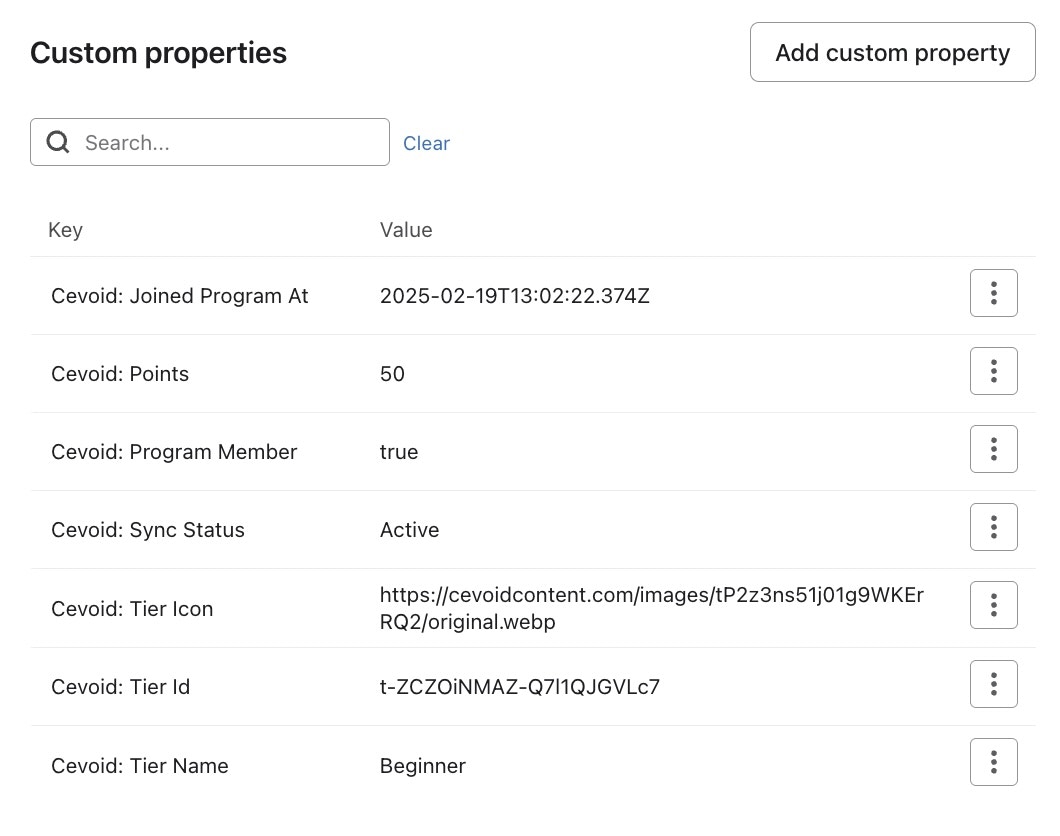
Sync profile data to Klaviyo as custom properties
Profile data will appear in Klaviyo as custom properties on a profile.Show how it looks in Klaviyo
Show how it looks in Klaviyo
Activate profile data sharing to Klaviyo
Profile data collected or updated after you activate the fields will be synced automatically to Klaviyo
- Navigate to Settings -> Integrations -> Klaviyo
- Navigate to the Profile data section
- Click Edit fields
- Toggle on the profile data fields you want to keep synced to Klaviyo
- Click Save Changes
Sync profile data from historical profiles
- Navigate to Settings -> Integrations -> Klaviyo
- Navigate to the Profile data section
- Click Sync all profiles
- Optional: Toggle on Sync specific segments and limit the sync to profiles that belong to specific standard segments
- Click Sync profiles
Send test data to Klaviyo
Sending test data will create a fake profile and add all activated profile data fields to that member, which allows you to preview it on the fake profile in Klaviyo
- Navigate to Settings -> Integrations -> Klaviyo
- Select the Klaviyo account you want to edit
- Navigate to the Profile data section
- Click Edit fields
- Click Test profile
- Click Create test profile